For your pleasure and enjoyment when spinning, the most important aspect of spinning wheel maintenance is to ensure the 3 main elements of the spinning wheel are free to rotate. Please use the following check list to ensure your wheel is smooth and easy to treadle.
Start by removing the drive and brake bands. Use Ashford Spinning Wheel oil on all nylon bearings. Wipe off any surplus oil. Since 2008 the wheels on all Ashford spinning wheels are mounted on ball bearings which are sealed for life and do not need any lubrication.
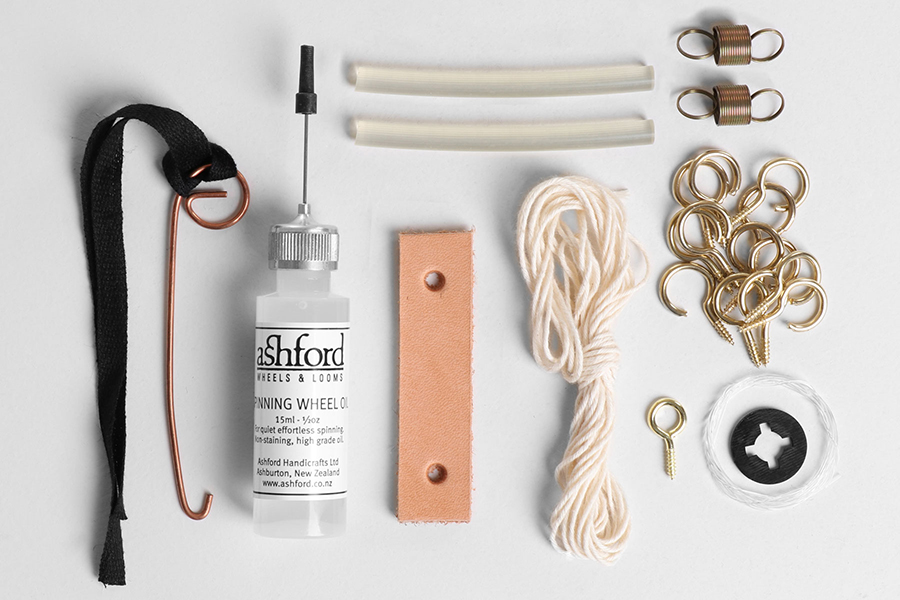
The Ashford Maintenance Kit includes a bottle of oil and most of the parts you will need to return your wheel to its original condition.
All spinning wheels
Wheel
- Spin the wheel. It should rotate freely for up 100 turns on ball bearings or 20 on nylon bearings. If it not:
- Remove any fibre that has accumulated on the crank or in the bearings with tweezers.
- Apply a drop of oil to the nylon con rod joint regularly.
- Rub candle wax or apply a drop of oil to the treadle rail pins to reduce noise or friction.
- If the moulded con rod joint squeaks, remove it from the treadle board and rub bees wax onto the section that fits in the wood.
- If the drive band is worn or the knot is lumpy, replace it with a new soft cotton drive band or Turbo Kit.
Early Wheels
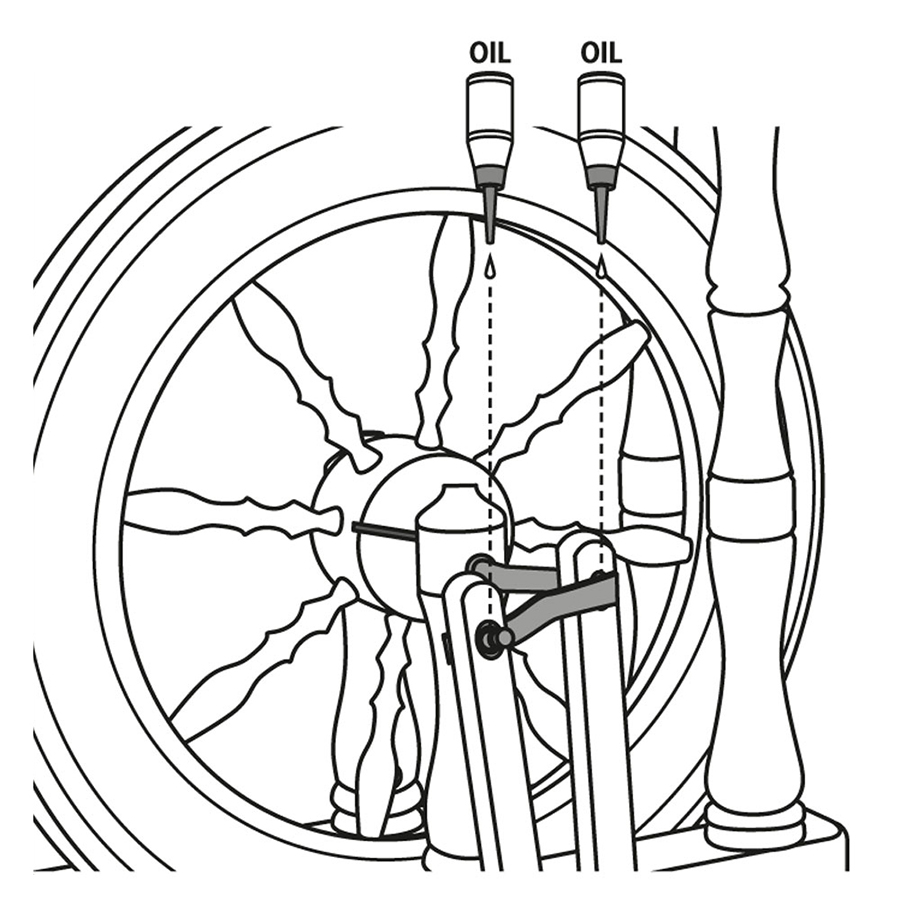
- Apply a drop of oil to the nylon wheel bearings regularly.
- If you have a double treadle wheel made before 2012, lay it on its back and apply a drop of oil to each hinge pins. Since then, we have used moulded hinges which do not need lubrication.
- If your wheel has a leather con rod joint that has become soft or floppy, replace it with a new leather joint.
- If you wheel has a round polyurethane con rod joint, check that the gap between the bottom of the con rod (pitman) and the treadle rail is between 12 – 18mm (1/2 – 3/4″). If greater than this, it can cause ankle strain and if closer the two can bind thus stretching the joint. If necessary, replace the joint and cut off any surplus underneath. The black moulded con rod joints were introduced in 2012.
Flyer
- Spin the flyer. It should rotate freely. If not:
- Check there is at least 1-3mm (1/16”) end-float between the flyer, bobbin, and flyer bearings.
- Check the flyer bearings are at right angles to the flyer shaft. If not, loosen the screws holding the maid uprights to the maiden bar, align the bearings and retighten the screws.
- Apply a drop of oil to the flyer and bobbin bearings.
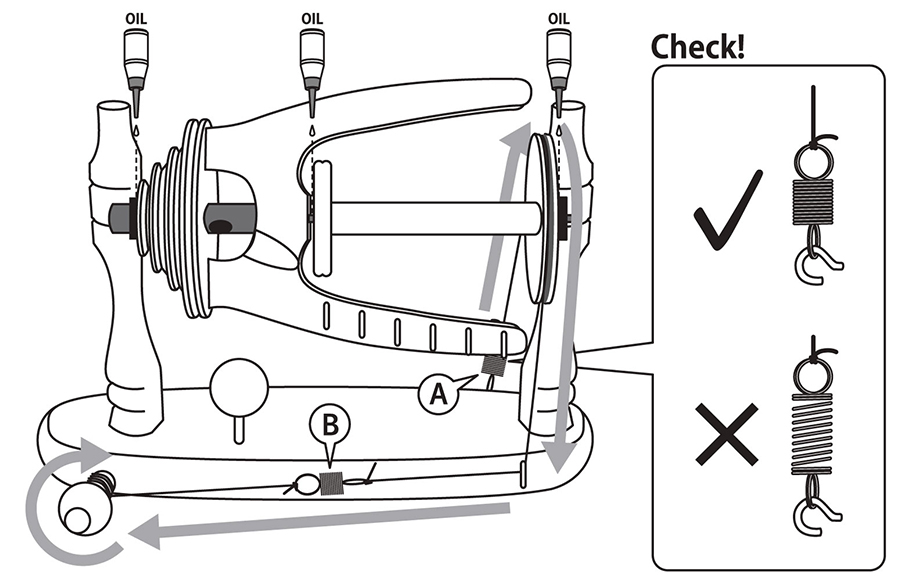
- If the spinning wheel is hard to treadle reduce the tension on the brake band. Ideally the springs should just start to stretch but never more than their own length.
- All Ashford spinning wheels now have 2 tension springs attached to the brake band either side of the bobbin whorl. These allow the brake band to work freely when both spinning and plying. If your wheel only has 1 tension spring, add a second tension spring on the opposite side.
- Check and remove any lanoline that may have built up in the flyer orifice.
- If the yarn wont feed onto the bobbin, check for metal burrs on the inside of the flyer orifice exit hole. If necessary, remove with a file or sandpaper.
- If the yarn wont feed onto the bobbin, check in case the yarn is snagged or looped around a flyer hook or yarn guide.
- If the flyer hooks are worn or rough, replace them.
- If the nylon ring in a squeeze and slide yarn guide has a groove worn in it, simply rotate the ring until the yarn runs on a new smooth section.
- If the yarn guide doesn’t slide easily on the flyer arm, remove the yarn guide and rub a thin film of Ashford Finishing Wax onto the black fiberglass arms and rub it off with a soft cloth. Reinstall the yarn guide.
- If the wheel has been finished with polyurethane, lacquer or wax, check there isn’t any surplus material on the spindle, flyer or bobbin bearings that may be causing friction. If necessary, scrape this off with a craft knife or file.
Bobbins
- Spin the bobbin on the flyer shaft. It should rotate freely. If not:
- Apply a drop of oil to the bobbin bearings.
- Check there is at least 1-3mm (1/16”) end float between the flyer, bobbin, and flyer bearings.
- If the bobbin is still tight on the flyer shaft, ream the bearings with a 1/4” (6.25mm) round fine chain saw file or fine sandpaper wrapped around a pencil.
Early bobbins
- Bobbins made prior to 1980 didn’t have nylon bearings. If the bobbin centre has warped or the hole is worn, then it is time to replace it with a new bobbin.
- If a new bobbin has been fitted to a very old flyer and the small bobbin end rubs against the flyer, use a wood file or sandpaper or to remove wood where the bobbin touches the flyer.
- If the bobbin ends are loose, re-glue them with a reliable wood glue.
Double Drive Flyer and Bobbin
- If the flyer doesn’t spin freely and there isn’t any float between the flyer and the front and rear bearings check that the flyer shaft is fully pushed into the whorl.
- If the whorl is hard to push on to the spindle, apply a drop of oil to the end of the spindle.
- For the yarn to be pulled onto the bobbin, the bobbin whorl must be smaller (or larger) than the flyer whorl to ensure the bobbin rotates faster (or slower) than the flyer.
- The bobbin whorl is “U” shaped to allow the bobbin to slow down when drafting and speed up to pull the yarn on when feeding in. Check the bobbin whorl is smooth and “U” shaped. If necessary, sand it smooth with fine sandpaper.
- The grooves in the flyer whorls are “V” shaped to ensure the flyer rotates at a constant speed.
Timber
Ashford spinning wheels are made from beautiful Beech hardwood. To enhance the natural beauty of the timber, restore, nourish, protect, and give your wheel a rich smooth luster, apply a coat of Ashford Finishing Wax Polish.
Your Ashford spinning wheels
Click on the your Spinning Wheel model for more maintenance information.