Big Blanket, Little Loom

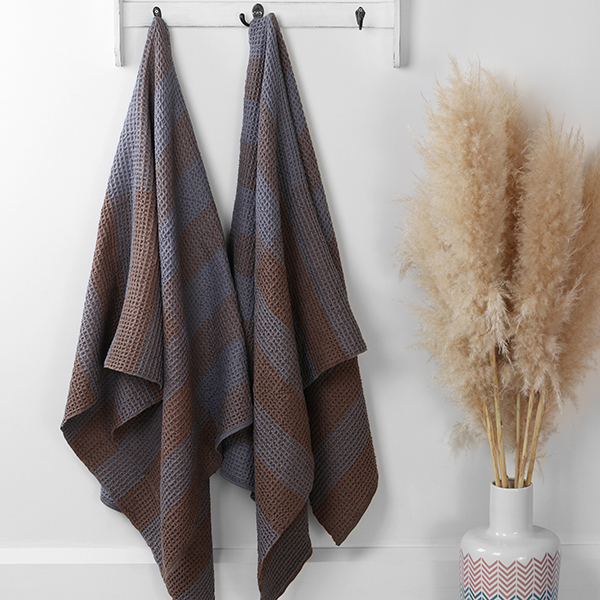
I love weaving with wool and one of my favourite things to weave at this time of year (it’s winter here in New Zealand) is blankets. On a rigid heddle loom they are quick and easy. You don’t need a big loom or even double heddles to weave a beautiful, soft and cosy blanket – big enough for the bed or for just snuggling up on the couch. This blanket is woven on a 40cm (16″) SampleIt loom and features invisible joins, knotless fringes and a beautiful brushed finish.

I hope you enjoy this project.

Happy weaving.

Kate

Big Blanket, Little Loom – it’s all in the details!

You will need:

Loom: 40cm (16”) or wider rigid heddle – I used a 40cm (16″) SampleIt loom
Reed: 30/10cm (7.5dpi)
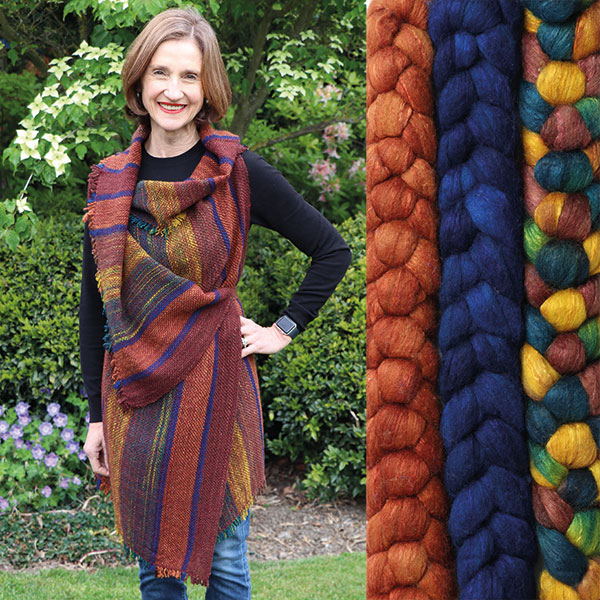
Warp and Weft Yarn: Ashford Triple Knit 100% wool (150m/100gm) 3 balls of each colour 808 (MC1), 809 (MC2), 806 (MC3), 813 (MC4) and one ball of contrast colour 804 (CC)
Scrap yarn to spread the warp
Fringe Twister
Darning/Wool needle
Stiff bristled brush – scrubbing brushes are ideal

The blanket is woven in 4 panels then sewn together and finished.

Here’s how:

Total warp length for each panel: 2.3m (90”)
Total warp ends for each panel: 120
Finished size: 155 x 165cm (not including fringe) 

Warping

You will warp the loom four times, once for each panel. Each panel will use a different main colour. Warp 2 slots of contrast colour, 56 slots main colour, 2 slots of contrast colour. Ensure you start from the very outside slot. Leash on to save wasting warp length, this makes evening your tension a breeze. Use the scrap yarn to spread the warp and then you are ready to weave. Remember to leave a tail of weft yarn three times the width of the warp so you can hemstitch after you have woven a few rows.

Weaving

The weaving sequence will be the same for each panel, so that the colours match up across the width of the blanket. Weave 4 picks of CC, 96 picks of MC1 , 8 picks of CC, 96 picks of MC2, 8 picks of CC, 96 picks of MC3, 8 picks of CC, 96 picks of MC4 finishing with 4 picks of CC.

I like to weave about 6 or 7cm (2-3″) and then remove the scrap yarn that was used to spread the warp and hemstitch. You will hemstitch at the beginning and end of each of the panels.  To hemstitch start on the outside edge, you may have to go over or under the first thread depending on where your tail came out. Take the needle under 3 warp threads and come back around to where you started, then take the needle under three warp threads and come out two rows up. Repeat across the width of the warp. 

step 1 under three warp threads and back around
step 2 in the same place go under three warp threads again and up two rows
step 3 come back down to the bottom row and repeat from step 1

Hints

When weaving panels with stripes that need to match, I prefer to count the picks rather than measure the length of weaving. For easy counting I insert a piece of contrast cotton in after each 20 picks. If you get interrupted you can easily see where you are up to and they can be easily removed at the end.

To get perfect edges take the shuttle through the shed and hold the yarn on the edge between your finger and thumb in line with the slot the outside warp thread is in. Pull the other end taut upwards on an angle. Release the thread then release the pinched edge. By pinching the yarn and holding it in line with the outside thread you will prevent any draw in. MAKE sure you let go of the end upwards on an angle BEFORE you let go of the pinch. 

gently pull the weft out taut
pinch the weft and outside warp thread keeping inline with the slot the outside thread is in
pull the weft taut on an angle
let go of weft end THEN let go of pinched edge

Beat consistently, do not over beat, remember the fabric will always look different on the loom than it will off the loom. It will also look a lot different once it has been washed. 

on the loom

Assembling 

Once you have all four panels woven you need to join them.The most seamless join to use is the “entrabe union” method. This is simple and produces a seamless finish that is almost invisible. 
Take a length of the contrast colour yarn longer than the length of the panel. Start by going through the end of the fabric and securing the tail with a knot. With the two panels laying flat next to each other (making sure you have the panels up the right way before you start so your colour sequence is correct) take the needle through the first weft loop on one panel then the first weft loop on the other panel continue picking up each loop alternating side to side. When you get to the end secure with a knot.  Ensure you smooth the joined fabric out so you do not get any bunching up along the join.

collect one loop from each side
continue along the length
smooth out as you go

Once the panels are joined twist the ends and knot to make the fringes.

twist all the ends and knot

Finishing

Soak blanket in hot water (with no agitation at all) for 1 hour.  To ensure your fringe is secure when you cut off the knots you can semi-felt them a little. I use a cake of soap for this part. I take 2-3 of the fringes and give them a wipe with the cake of soap then rub them back and forth between my palms. Once you have semi-felted the fringes wash blanket in a machine on a gentle wool wash. Check the results are to your liking, if the weave is still too open for your liking you can wash a second time. You do not want it to completely felt – just nice and fulled.
While it is still damp lay on a flat surface and beat the wrinkles out with your hand opened flat. Allow to dry flat.
Once the blanket is dry, trim the knots off the fringes. I find using a ruler and a rotary cutter works best.

using a rotary cutter and ruler to get perfect even fringes

Now your blanket is ready to be brushed. Use a scrubbing brush or other stiff bristled brush to brush the entire surface on both sides. I find using a short flicking motion works the best.

brush both sides
a short flicking motion works well
joins are almost invisible after brushing!
Finished size: 155 x 165cm (not including fringe)