
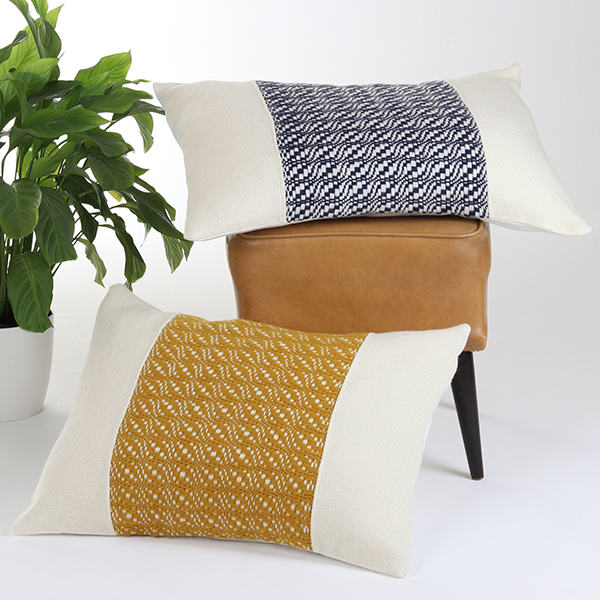
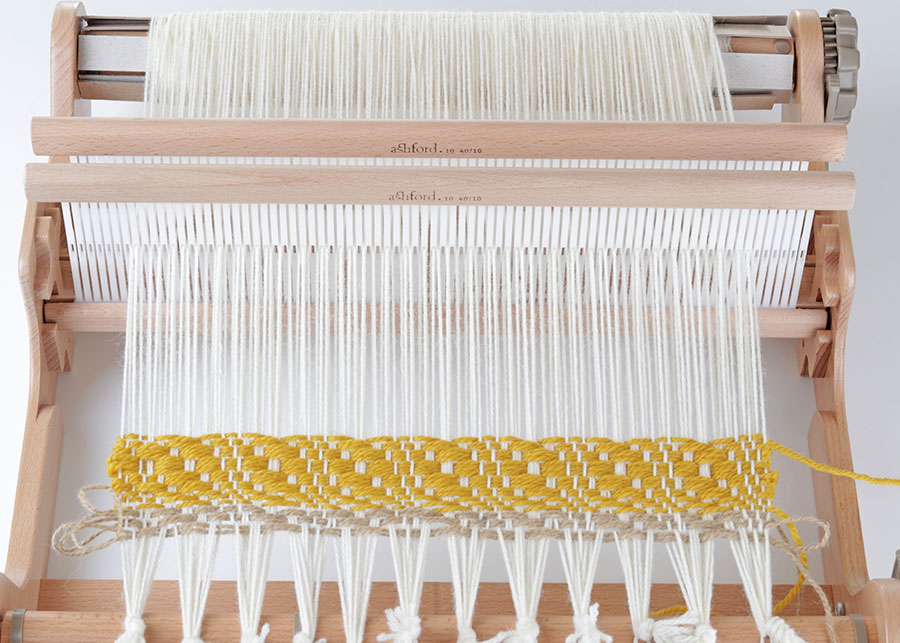
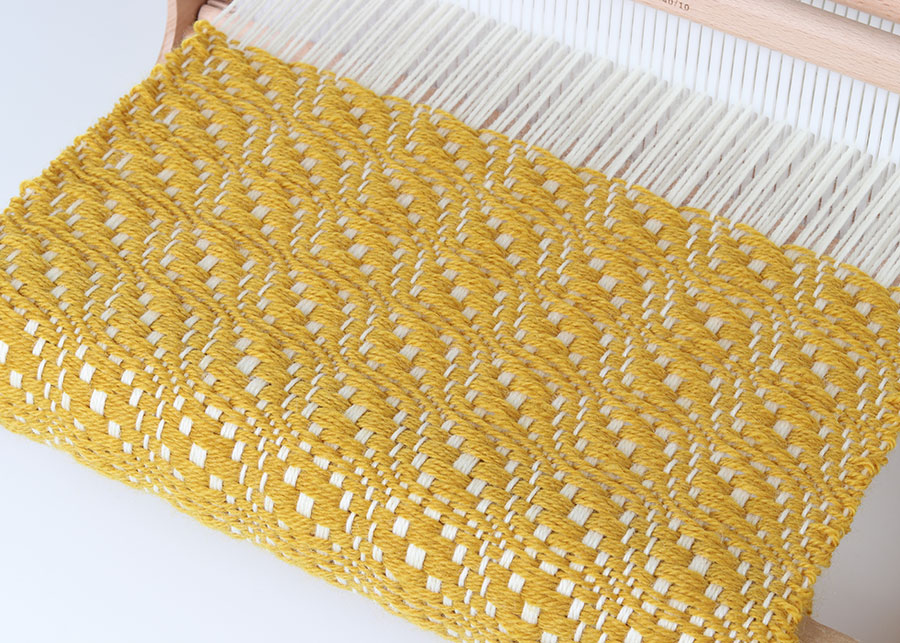
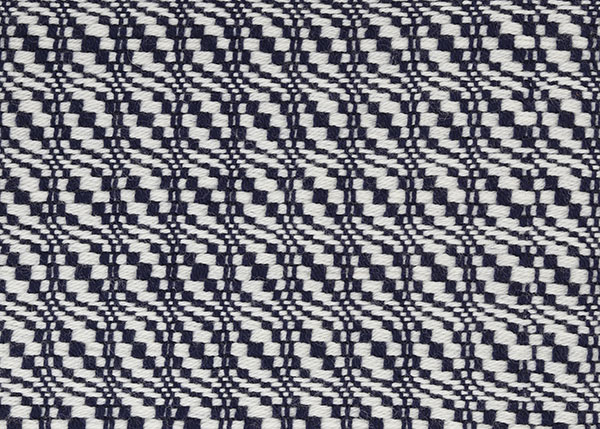
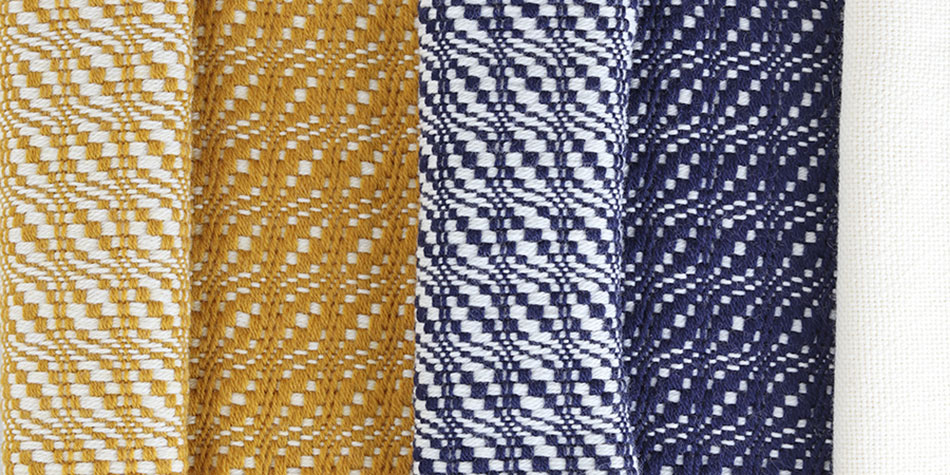
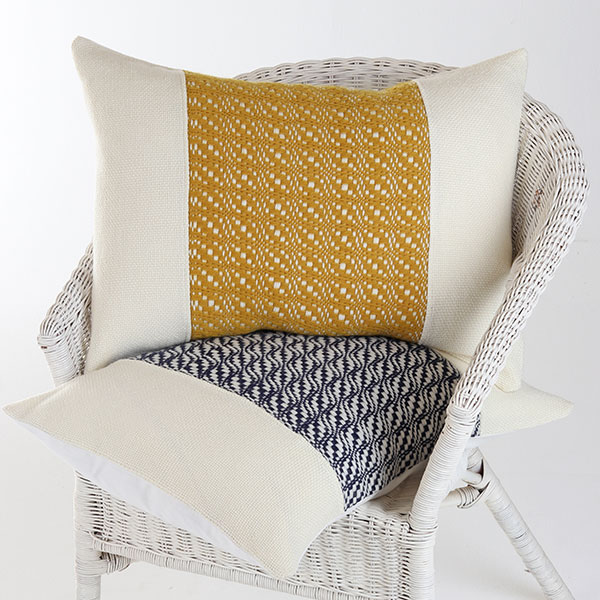
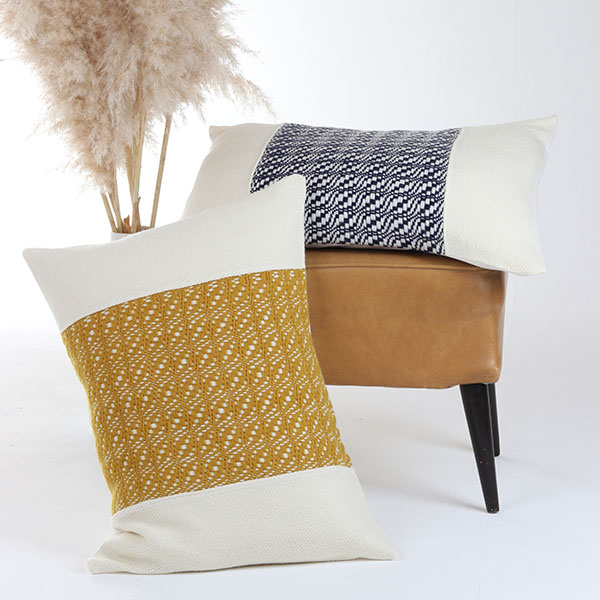
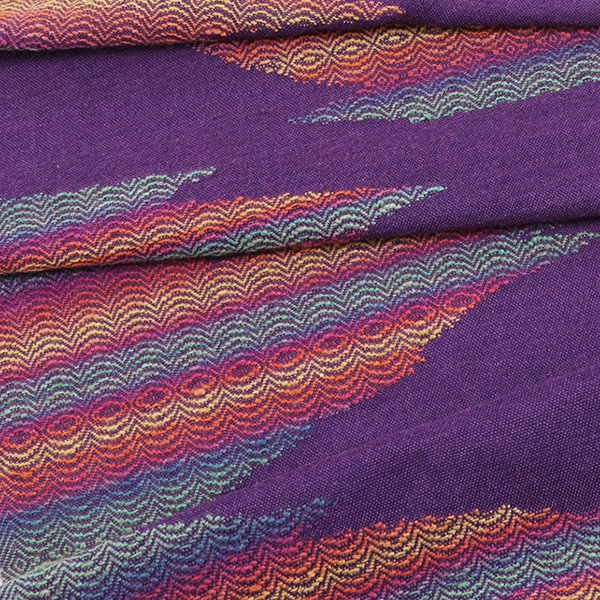
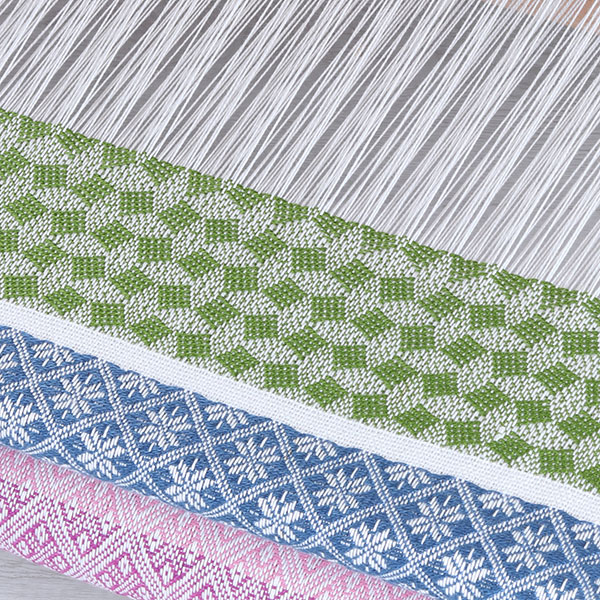
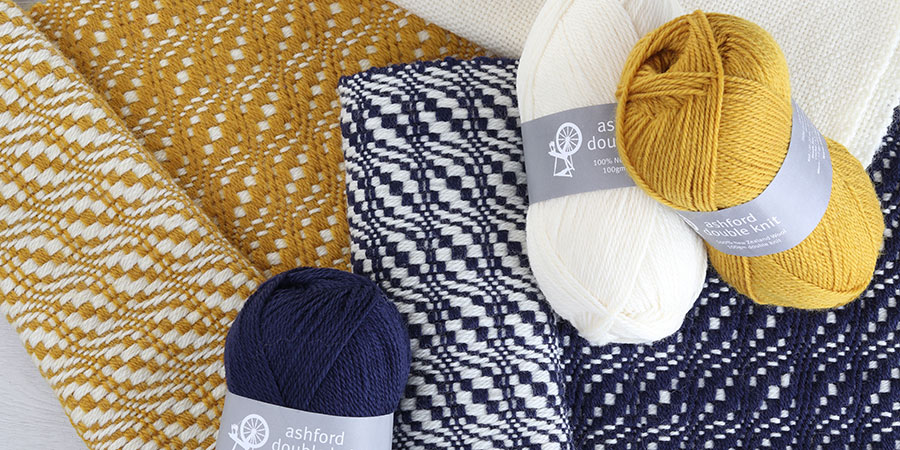
Undulating Twill – on a Rigid Heddle loom
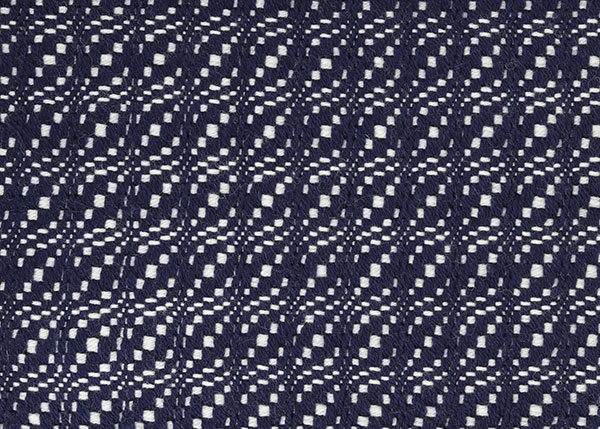
Undulating – to move in a wave-like pattern.
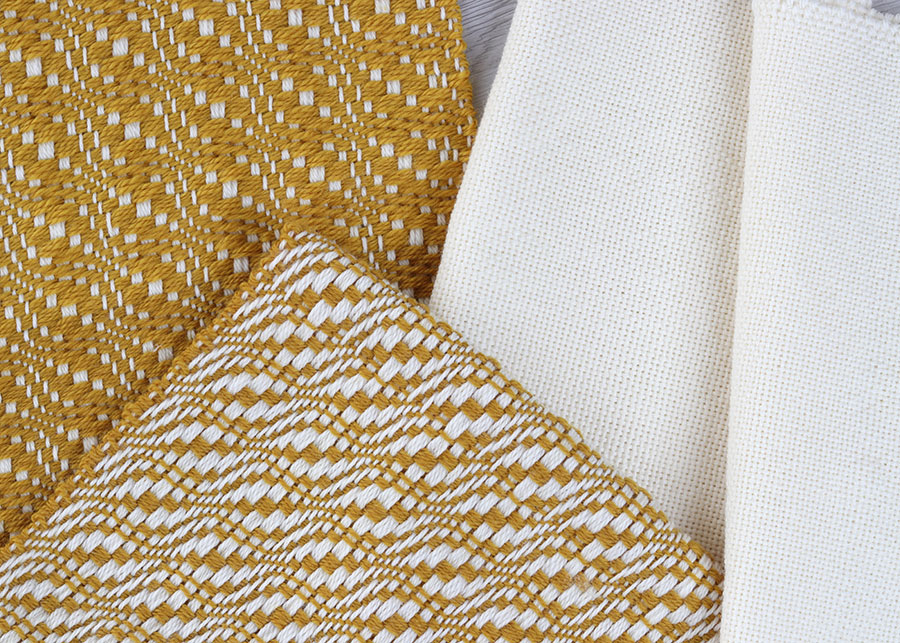
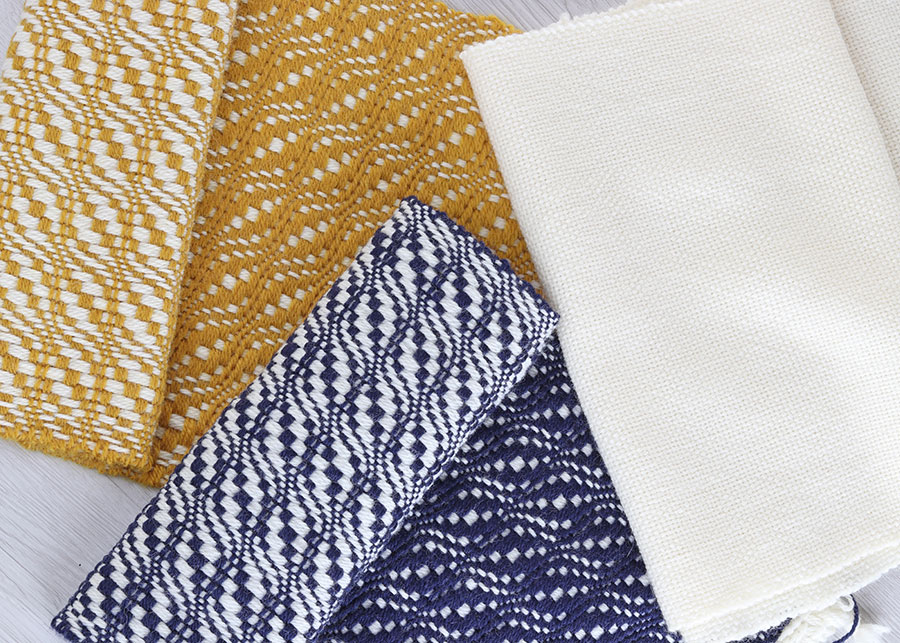
This beautiful design is based on a traditional twill, usually woven on four or eight shafts – but now you can create it on your rigid heddle loom! My friend Kurt @manknitea shared his draft for an undulating twill with me, and I just had to try it. The results were incredibly pleasing, and now I’m excited to share them with you.
Happy weaving!
Kate
Using two heddles, this project is easier than you might expect. Follow the steps below to weave this fabric and create two stunning cushion covers.
You Will Need
Loom: Rigid heddle loom, 40cm (16″) or wider
Reeds: 2 × 10dpi (40/10)
Warp yarn: Ashford DK 100% Wool
- Natural White (814) – 3 × 100g balls
Weft yarn: Ashford DK 100% Wool
- Natural White (814)
- Old Gold (815)
- Old Navy (810)

Warp Planning
You will weave two fabrics:
- Plain fabric
- Patterned undulating twill fabric for the front
Piece | Total Warp Ends | Slots | Warp Length |
Plain fabric | 136 | 68 | 1.8m (71″) |
Patterned fabric | 136 | 68 | 1.8m (71″) |
Step 1: Weave Plain Fabric
- Warp 68 slots with Natural White.
- Wind onto the back roller and thread the eyes, leash on and spread the warp as usual.
- Weave the full length of the warp using Natural White.
- Check for a balanced weave of 10 rows per inch.
- Remove from the loom and set aside.

Step 2: Warp for Patterned Fabric
- Warp 68 slots with Natural White and wind onto the back roller.
- Prepare to thread the back reed following the draft.
Step 3: Thread the Back Reed
- Read the draft from left to right.
- Numbers indicate how many threads go in each slot or eye.
- If there is no number, leave it empty.
Looking at the draft you can see the first thread goes through a slot and the next thread goes through an eye so take the second thread from the slot and move it to the eye immediately to the right. The next says two threads in a slot -so leave both threads in the slot. The next one is one thread in an eye, you will take this from the slot to the right and place in the eye. Continue following the draft carefully.

Once you have threaded to the end of the green section – repeat the green section again 6 more times (7 total repeats) and finish with the blue section on the right.
Some slots and eyes will be empty, others will have two threads. This is normal – trust the process!


Step 4: Thread the Front Reed
- Move the threaded back reed to the back position on the loom.
- Place the second reed in the front position.
- Starting from the left, take the threads in order from the back reed and follow the second threading draft below.
Looking at the draft you can see the first two threads are through a slot, you will take the threads from the first slot and eye on the back reed through the slot on the front reed. Next you will take one of the threads from the slot on the back reed through the eye on the front reed and the other from the back reed slot will go through the slot in the front.
Once you have threaded to the end of the pink section, repeat the pink section again 5 more times (6 total repeats), then finish with the blue section on the right.


Step 5: Prepare to Weave
- Tie warp ends into groups of 6–8 using overhand knots.
- Leash on (lash on) to the front warp stick. [See Video tutorial here]
- Spread the warp using scrap yarn. [See Video tutorial here]
- Wind your shuttle with your first pattern colour.

Step 6: Weaving Sequence
The undulating twill pattern uses an 18-row repeat.
Tip: Because you weave multiple rows in the same shed, always take the shuttle over or under the outermost thread to ensure it is “caught”.
Row(s) | Action |
1 | Front Reed Up |
2 | Back Reed Up |
3 | Both Reeds Down |
4–5 | Front Reed Up (two rows in same shed) |
6–8 | Back Reed Up (three rows in same shed) |
9–12 | Both Reeds Down (four rows in same shed) |
13–15 | Front Reed Up (three rows in same shed) |
16–17 | Back Reed Up (two rows in same shed) |
18 | Both Reeds Down |


Repeat rows 1–18 for half the length of the warp, then change to your second weft colour.
I chose to hemstitch the end of the first colour, cut off the first piece, and re-leash on before weaving with the second colour.
Helpful Hints
- Always check that you go over or under the outside thread at the edge.
- To avoid your weaving pulling in – take the shuttle through the shed, pinch the weft thread in line with the outside warp thread, lay the weft thread at a 30-degree angle, then release the pinched side and gently place the weft.
- Gently “strum” across the warp in front of and behind the reeds to check for crossed threads.

Finishing
- Soak the woven fabric in hot water with a drop of dish liquid or wool wash for 30 minutes.
- Gently agitate, rinse, and squeeze out excess water.
- Lay flat to dry.


Assembly
- Cut the plain fabric in half and secure ends with a zigzag stitch or overlocker.
- Place one plain piece and one patterned piece right sides together.
- Sew along one side, press the seam open, and topstitch if desired.
- Place the sewn piece on your backing fabric and sew around the outside.
- Turn inside out and stuff with a cushion insert.

Which side do you prefer?


