
Upcycling on your rigid heddle loom
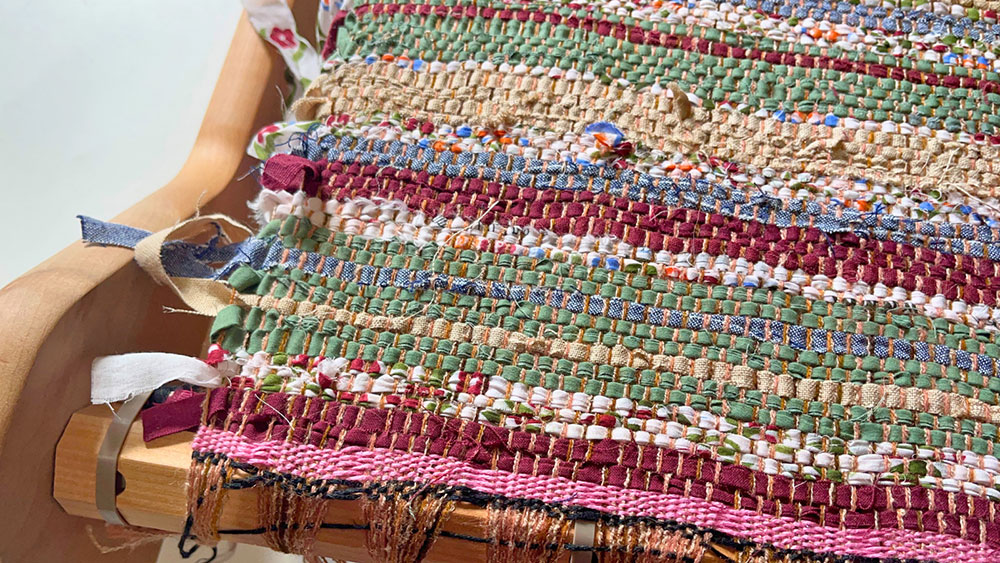
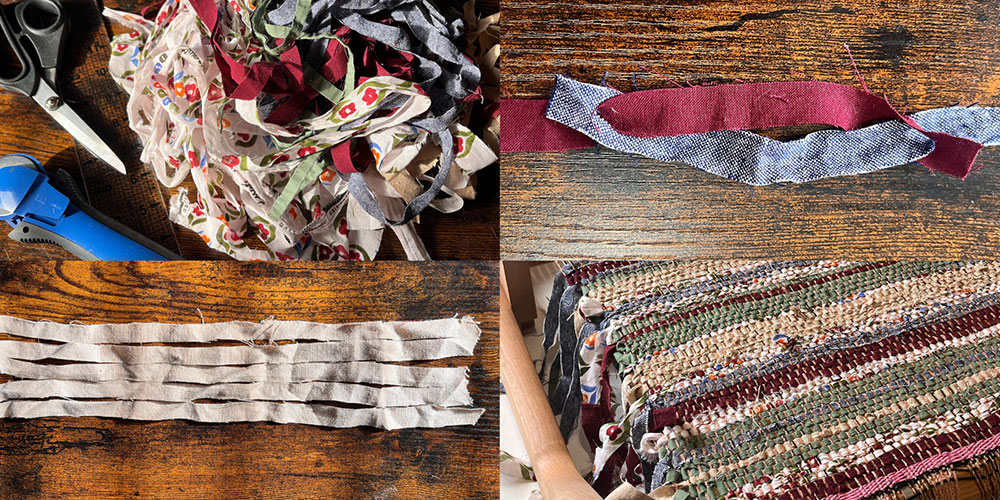
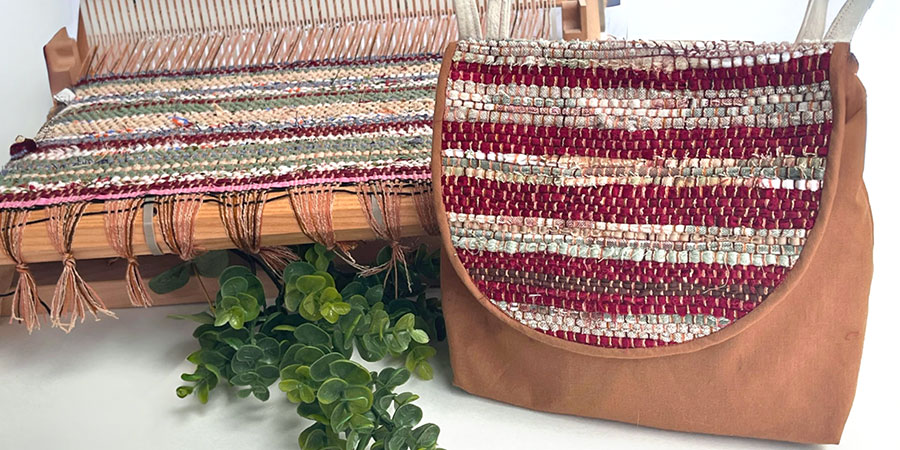
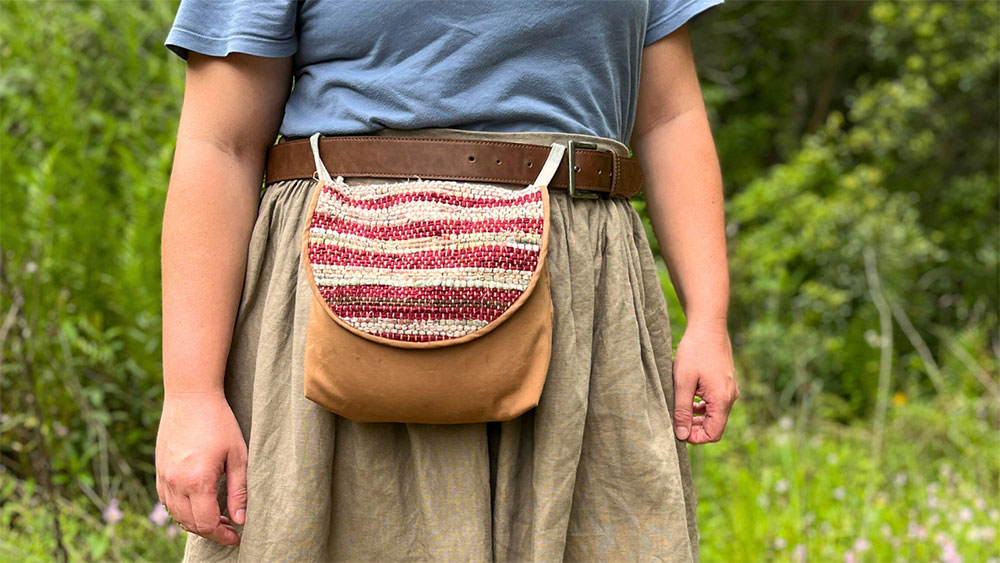
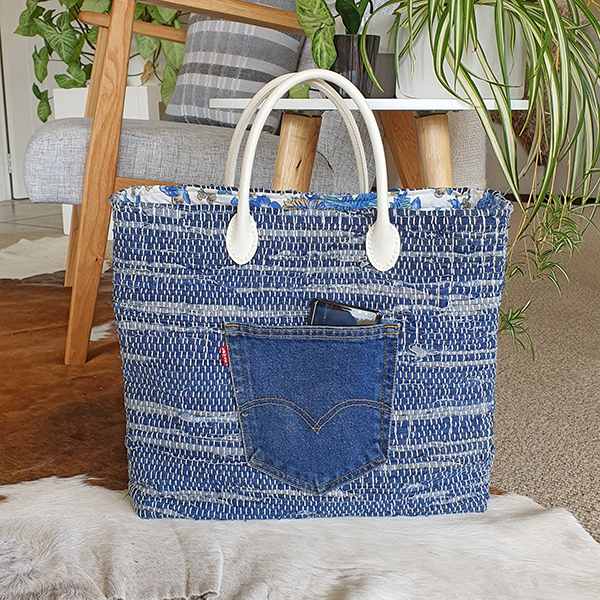
One of the things I love most about weaving is how it brings together creativity, sustainability, and the joy of making something by hand. It is always inspiring to see how makers are using their Ashford looms. In this guest post, Erica from Twig + Tale shares how she transformed a pile of fabric scraps into a beautiful handwoven version of their Leaf Hip Pouch—combining her love of sewing, upcycling, and weaving on her Ashford Rigid Heddle Loom.
I hope you enjoy her story as much as we did!
Kate
I must admit – I have a soft spot in my heart for a good transformation story. I think it’s much of what I love so much about upcycling: taking items that were destined for the bin, and seeing them transformed into something useful, and beautiful. It feels like a bit of magic…not just for sustainability reasons, but for the amazing creative opportunities as well.
So, to find a way to combine my long-loved crafts of upcycling and sewing to my newfound love of weaving? Be still my heart!
I hope you enjoy the story of this handwoven take on our new Leaf Hip Pouch at Twig + Tale – and that it inspires your own sustainable, creative weaving pursuits as well.
-Erica xx
Community Manager at Twig + Tale
Here’s the details:
I used my Rigid Heddle Loom to weave a variety of non-stretch cotton and linen scraps from my scrap basket into a brand-new handwoven material. Each scrap was cut into 1-2cm wide strips – a perfect use for lots of the long, unusable bits from cutting out sewing patterns or breaking down upcycled textiles, like hems and elastic casings. (In fact that’s where many of these fabrics came from!)

My loom was double-warped with a very lightweight mystery yarn that I received secondhand, with a 7.5dpi reed – this paired with the chunky fabric “yarn” perfectly.
I opted for a simple plain weave – but certainly the technique could be adapted to any weave one desired! There’s so many other ways to experiment with it too. You could…
- Use a mix of fabric weights or strip widths for more variation in the fabric
- Switch between yarn and fabric strips for contrast stripes
- Twist the yarn before weaving, or ply fabric strips together
- Include different textures of fabrics
- And more!

A couple of tips for your own projects:
- Mixing different widths of strips works just fine, but try to keep each strip itself as even down the length as possible, for more balanced weaving.
- Longer strips can be brought back and forth through the warp a few times – whereas shorter strips can just be passed through once, and the ends will be loose. If you want to combine multiple strips into one long piece to weave with, you can cut slits at each end, and join two strips together by passing them through the holes and pulling tight.
- If all you have are shorter scraps, they can be used too! Just alternate cutting long slits into either side, and you will end up with one long strip. The bumps at each end will mostly end up concealed in the weave as little slubs – you can trim the harsh corners to help them “hide” better.
- I didn’t worry about tucking in my ends, as this panel was intended to be cut into. If you are using this as a more finished piece, you’ll want to tuck any loose ends back into your weaving to secure them, and hemstitch each end.
If you’re interested in following along further in this pouch’s journey, or want some tips on how I made my new handwoven material work in my project, I’ve shared all about it over on our own Twig + Tale Blog – come on by and see!
TIP FROM KATE – When weaving fabric strips, use the reed to “place” the row and then weave the next row. Use a tapestry beater rather than the reed to compact the fabric. Check out the technique here


For another fun project using recycled fabric – denim – check out the “Recyceld Denim Bag” blog post
